How to Create a Homegroup Windows 7
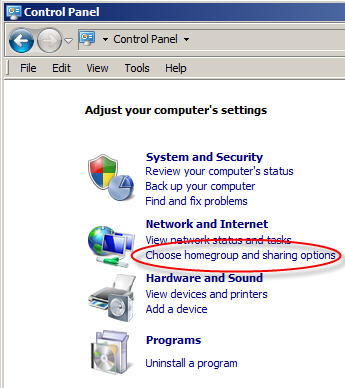
Sharing files across your home network has never been easier by using the homegroup feature in Windows 7. It is simple....YES! What you will need is a computer running Windows 7 Home Premium version or above to create the homegroup. All Windows 7 computers will be able to join the homegroup reguardless of the Windows 7 version. Here are the simple steps: 1) Click on your Start Menu and click on Control Panel. You can also type
"homegroup" in the Start Menu's search box if you want. 2) In the Control Panel window, go to Network and Internet
section and click "Choose homegroup and Sharing Options" when you are viewing the Control
Panel in "Category" view.
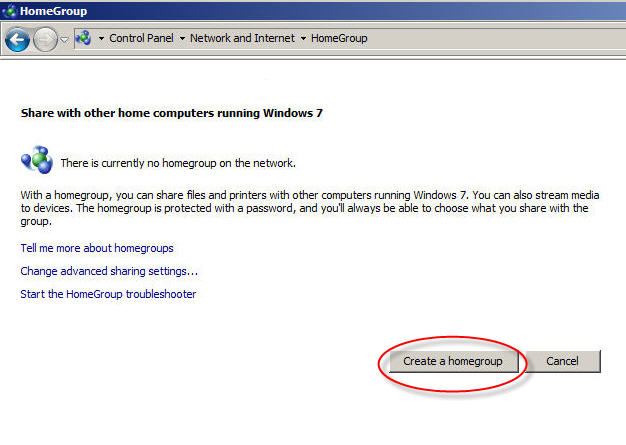
3) If you have never created a homegroup before, you will see this window "Share with other home computers running Windows 7". Click "Create a homegroup button".
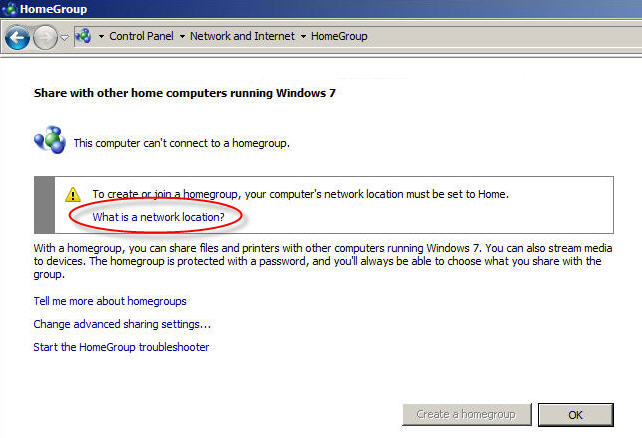
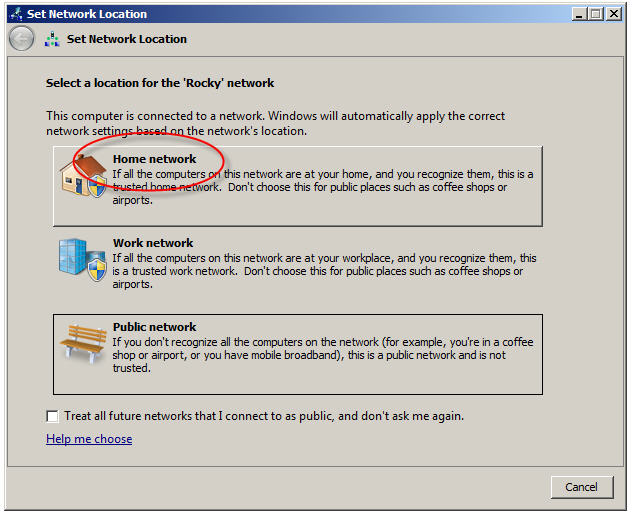
Here are 3 things to Make Note of: a) If a homegroup already exists on your home network, you'll be prompted to join it instead of being asked to creat a new one. b) If your network location type is set to "Public" you will be prompted to change your location to "Home". Only location type "Home" will work with the creation of a "Homegroup". In this case a new window will popup like this one shown below here. If you wish to continue to create a "Homegroup" you will need to change your location by clicking on "What is a network location?" before continuing with this tutorial.
c) Click on "Home Network". At this point you will be prompted to create a homegroup too.
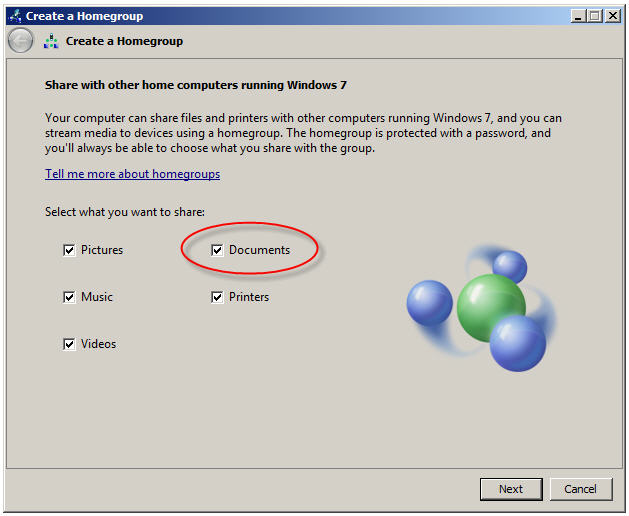
4) If you also want to also share your documents on your home network be sure to place a check mark in the box next to "Documents". Choose the sharing options and click "Next".
5) In few moments (it may take a minute or so) your system will create your
homegroup. |
|
